
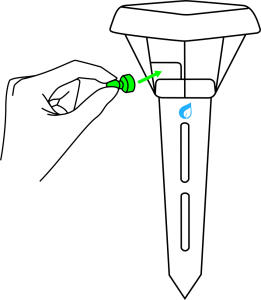
Follow the steps in this article to reset the sensor, if you are having trouble connecting Spruce Sensors to the network, or if the Spruce Sensor isn’t working properly. Please perform these steps next to your Spruce Controller (within 5 feet or standing next to the Controller) to eliminate any range concerns.
Channel 26 Limitation
Spruce Sensors will NOT connect if your Zigbee is configured to Channel 26.
Channel 26 is not supported because Zigbee requires this channel use a low transmission power. This greatly reduces the wireless range. If your hub is set to channel 26, you will need to change the channel for Spruce sensors to connect. Most apps have an option to change the channel, check with your hub manufacturer to change the channel.
SmartThings, Hubitat and Home Assistant
Add, Reconnect or Re-join Spruce Sensor to a ZigBee network
Adding the Spruce Sensor to a ZigBee network involves two basic steps:
- Starting the pairing process on the hub, which is typically done through an app.
- Starting the join process on the Spruce Sensor.
The Spruce Sensor typically successfully joins to a network within 30 seconds.
Starting the Pairing Mode on the Spruce Controller
- Refer to the video below, which shows an actual sensor being added to the app.
- In the Spruce App, open the navigation menu and click or tap the + Add Devices option
- Select “Spruce Sensor” and follow the on-screen instructions.

Third party hubs: SmartThings or Hubitat
The Spruce Sensor can only connect to one Zigbee network at a time. Refer to the SmartThings or Hubitat support pages for information on “sharing” Spruce Sensor data with the Spruce app.
- Refer to the instructions for the third party hub for details.
- Check the Spruce + SmartThings or Spruce + Hubitat support pages for
- Initiate the “join” , “add device” or “scan” routine in the third party app. The third party app should begin searching for devices.
- The third party app should identify the Spruce Sensor
Gen3 Spruce Sensor
The Gen3 Sensor magnet pad is at the center of the lid and uses a green and red led to signal the join and remove status.

Remove Gen3 Spruce Sensor from the network
The Gen3 Sensor has a Red and Green LED. The LED color can be hard to see and the cap may need to be removed to clearly see the colors.
- Unpair the Sensor by holding the magnet to the magnet pad for ~5 seconds. The sensor will then blink red 2 times – that means it has been removed from the network.
- Check the pair status by briefly tapping the magnet to the Sensor pad on the cap.
- If the LED blinks green 3x, it is paired to a network
- If the LED blinks red and then begins alternating red and green, it is not joined to a network and has begun searching for a network to join.
- If the LED blinks green and then red 2x, the sensor is attached to a network but cannot find the network. The sensor needs to be unpaired in Step 1.
- The sensor will not be removed from the app when it is unpaired. The sensor must be removed from the app if you would like to remove the Sensor and data from the app.
- The presence of the sensor in your account will not prevent the sensor from joining the network again, so it is not necessary to remove the sensor from the app, if you intend to add it again.
Starting Join Mode on the Gen3 Spruce Sensor
- To initiate the join process on the sensor, tap the magnet once to the magnet pad to start the join process on the sensor.
- The sensor will begin alternating Red and Green as it searches for a network to join
- When the sensor has joined a network, it will blink green 3x.
Gen3 Spruce Sensor Troubleshooting
See the Gen3 Spruce Sensor Guide for troubleshooting
Gen2 Spruce Sensor
The Gen2 Spruce Sensor magnet pad is on the side of the sensor and uses audible beeps to signal join and remove status.
To initiate the join process on the sensor, tap the magnet once to the magnet pad to start the join process on the sensor.
Remove Gen 2 Spruce Sensor from the network
- Unpair the Sensor by holding the magnet to the magnet pad for ~5 seconds. The sensor will then beep 5 times – that means it has unjoined.
- The sensor will only beep 5 times if it is currently joined to a ZigBee network. The beeping 5 times is indicative of the removal process. If the sensor does not beep 5 times after holding the magnet to the magnet pad, the sensor is already unjoined.
- The sensor will not remove itself from the app when it is removed physically. The presence of the sensor in your account will not prevent the sensor from joining the network again, so it is not necessary to remove the sensor from the app, if you intend to add it again.
Starting Join Mode on the Gen2 Spruce Sensor
To initiate the join process on the sensor, tap the magnet once to the magnet pad to start the join process on the sensor.
- The sensor will beep 1 time to acknowledge the magnet tap.
- When the sensor has been found by the parent network, the sensor will beep 3 times.
Gen2 Spruce Sensor Troubleshooting
Gen 2 Sensor Beep Codes
| Magnet Usage | Number of Beeps | Explanation | |
|---|---|---|---|
| Quick Tap | 1 | The sensor is not currently connected to a parent network. The sensor has moved into join/search mode, and will continue for approximately 10 seconds. | |
| Quick Tap | 2 | The sensor has a parent Zigbee network, but is not currently connected (perhaps due to range) | |
| Quick Tap | 2, then 5 | The two beeps indicates that the sensor has a parent Zigbee network, but is not currently connected. The subsequent 5 beeps indicates that the sensor has been disconnected for a substantial period of time, and is attempting to leave the parent network. See below for more troubleshooting. | |
| Quick Tap | 3 | The sensor is currently connected to a Zigbee network | |
| Quick Tap | 1, then 3 | The first beep indicates that the sensor has moved into join/search mode. The subsequent 3 beeps indicates that the sensor has successfully joined a parent network. | |
| Long Hold (5 seconds) | 1 | The sensor acknowledged the long hold. If you are trying to remove a sensor, and expected 5 beeps to follow, the absence of the 5 beeps indicates that the sensor was not connected to a network to begin with, and therefore could not remove itself from a network. | |
| Long Hold (5 seconds) | 1, then 5 | The first beep indicates that the sensor acknowledged the long hold. The 5 beeps indicates that the sensor has initiated the process to remove itself from the parent network. |
Sensor is not beeping
- The sensor battery may be depleted
- If you have a voltmeter handy, try removing the battery and measure the voltage of the battery. If the voltage is below 2.3V, a new battery may be needed.
- The CR2477 batteries have their own internal resistance as well; you may notice that the voltage reads low after it is removed from a sensor, then slowly climbs back up – on the order of 1mV/second. After a while the battery maybe recover as much as 0.1 or 0.2 V. If you see this, it’s a good idea to let the battery sit for 15-30 minutes until it equilibrates, to get a better idea of the voltage.
- Make sure the magnet is engaging the correct area. The optimal location of the magnet sensor is actually slightly below the magnet pad.
- The battery may need to be discharged and re-installed
Sensor beeps once, but never joins
- The magnet tap (to initiate the join process on the sensor) must be done after the controller (hub) is listening/searching for devices. The Spruce Controller will flash red when in listening mode.
- The sensor join process (which is initiated by the quick magnet tap) will timeout after roughly 10 seconds. If the sensor hasn’t joined after 10 seconds, you may try tapping the magnet to the magnet pad again to re-start the join process on the sensor.
- Try removing and re-installing the battery.
Sensor keeps beeping twice, then five times when quick tapped with a magnet
- This beep sequence indicates that the sensor has a parent network remembered, but is not currently connected. It is attempting to leave the network, but is not succeeding (you will know when the sensor has successfully left its parent network, when a quick tap yields just one beep. This indicates that the sensor is ready to be joined).
- Try long-pressing the magnet to the magnet with the magnet pad. The sensor should beep 5 times. The “leave” routine is successful if a quick tap yields just one beep.
- Try removing the battery and discharging it using the Battery reset instructions.
- After installing the battery, you should hear 1 beep
- If the beep code is not a single beep, repeat the Battery reset instructions again until the beep code is 1 beep when inserting the battery in the correct polarization.
Battery reset instructions
- In some cases, the battery may not respond as expected due to charge state. Use the steps below to quickly reset and discharge the sensor circuitry.
- Remove the battery from the sensor
- Very briefly (less than 1 second), insert the battery just halfway with the wrong polarization (so + facing into the board). Remove the battery as soon as you have inserting the battery roughly halfway – you don’t want to keep the battery installed in the wrong polarization for any substantial length of time.
- Insert the battery the correct way (+ facing away from the board).
- If the sensor beeped when the battery was inserted, try going through the normal steps of joining the sensor with the magnet.